


Faire un papier avec une image par section et raccordements
TO DO A STATIONERY WITH ONE PICTURE BY SECTION
(Français and bad translation which looks like english langage ;-) )
Ce papier n'est pas très facile à faire, mais pas impossible non plus ;-)
This paper is not very easy to make , but not impossible; -)
Il faut trouver des images adequates avec des fonds unis pour se raccorder au fond uni du message.
It is necessary to find images with plain color funds to be seamless with to the plain color bottom of the message.
Nous allons utiliser les 9 sections du créateur de papier de WIkmail :
We will use the 9 sections of the Wikmail letter creator :
- haut gauche - top left
- haut centre - top center
- haut droit - topt right
- bas gauche - Left bottom
- bas centre - center bottom
- bas droit - right bottom
- gauche - left
- droit - right
- message - message

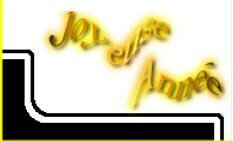
si nous reprenons en détail, nous aurons un haut gauche comme cela :
if we begin again in detail, we will have left top like that:

un haut centre comme ceci :
top center like this :
![]()
un haut droit ainsi :
top right as follow :
notre bas gauche ressemblera à cela :
left bottom will look like that :

notre bas centre :
bottom center :
![]()
et notre bas droit :
& right bottom :
nous aurons aussi un côté gauche :
& also left bottom :

et un côté droit :
& right :

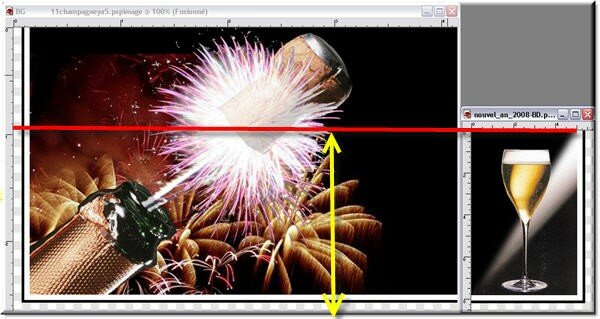
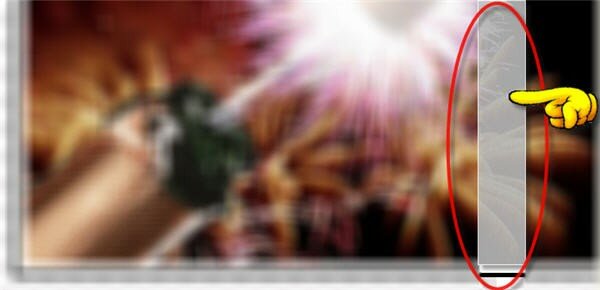
et enfin nous aurons une image dans la section message qui devra se raccorder exactement avec celle du bas gauche (pour cela il faudra tenir compte de la largeur du côté gauche - voir flèches vertes et bleues sur la vue d'ensemble plus haut)
and finally we will have an image in the message section which will be seamless with the left bottom image (it will be necessary to know the width of the left side - see on upper image : green and blue arrows ) :
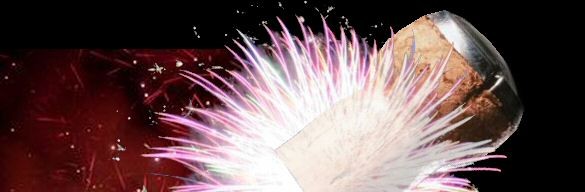
Commençons par faire notre image du bas droit :
we begin by making our right bottom image :

pour faire notre image du bas gauche, il faut penser qu'elle doit avoir la même hauteur exactement que celle du bas droit :
to make left bottom image , it must have the same height exactly as that of right bottom image :
nous allons donc découper notre image pour obtenir cette même hauteur :
we will cut out our image to obtain this same height:

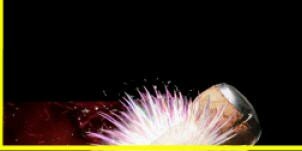
pour l'image du centre droit, nous prendrons une partie de celle du bas gauche et nous remplirons de noir (ou couleur du fond) la partie nécessaire :
for the right center image, we will cut a part of left bottom image and we will fill of black color the necessary part :
voilà ce que cela donne :
here are, what that gives:

l'image dans la section message sera la partie restant au dessus de l'image bas-gauche (attention de penser de déduire la partie qui ira à gauche, voir flèches vertes et bleues sur vue d'ensemble plus haut) :
the image in message section will be the remaining part on the top of the bottom-left image (deducing the part which will go on the left, see higher, green and blue arrows ):
notre image pour la section gauche :
image for the left section: :

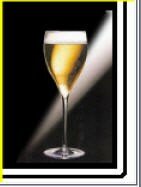
et notre image pour la section droite :
and image for the right section:
![]()
Pour le haut nous ferons une image reprenant l'ensemble du haut du papier (qu'importe la largeur) :
For the top we will make an image with the whole top of the paper (width is not essential):
nous couperons dedans la partie droite :
we will cut inside the right part :

puis de la même hauteur exactement, nous couperons dans l'image la partie gauche
with exactly same height we will cut in the image the left part

et enfin au centre nous couperons une petite image qui occupera la section centre
and finally in the center of this top image, we will cut a small image which for the top center section
![]()
Dans le créateur de papier de Wikmail, nous commencerons par la section haut.
Nous indiquerons une hauteur égale à celle de nos images hautes :
In the Wikmail stationery creator we will begin by the top section . We will indicate a height equal to image height

nous vérifierons à chaque fois les dimensions exactes de chaque image :
we will verify each time the exact lenght of each image:

dans la section haut gauche, nous mettrons la largeur exacte de notre image (ici 75) et cocherons les deux cases :
in the left top section , we will write the exact width of our image (here 75) and will notch the two boxes:

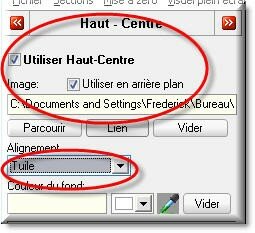
dans la partie haut centre nous cocherons aussi les deux cases et nous mettrons un alignement tuilé
in the top center section we will notch also the two boxes and we will choose : tiled
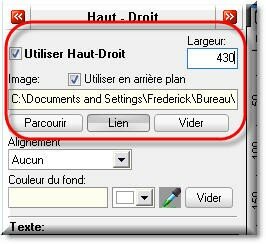
et dans la partie haut droit, nous indiquerons la largeur exacte de notre image & nous cocherons aussi les deux cases :
and in the top section , we will indicate the exact width of our image & we will notch also the two boxes:
nous pouvons voir dans l'aperçu le haut de notre papier.
Si nous ne nous sommes pas trompés dans les dimensions les trois images
we can see a seamless image in the snapshot, if we were not mistaken in dimensions the three images

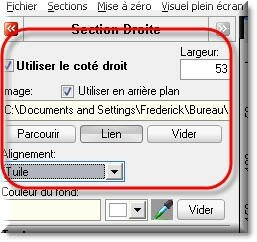
puis pour la section gauche nous indiquerons la largeur exacte de notre image, nous cocherons les deux cases et nous mettrons un aligement tuilé
then for the left section we will indicate the exact width of our image, we will notch the two boxes and we will choose Tiled

même chose pour la section droite :
same thing for the right side section
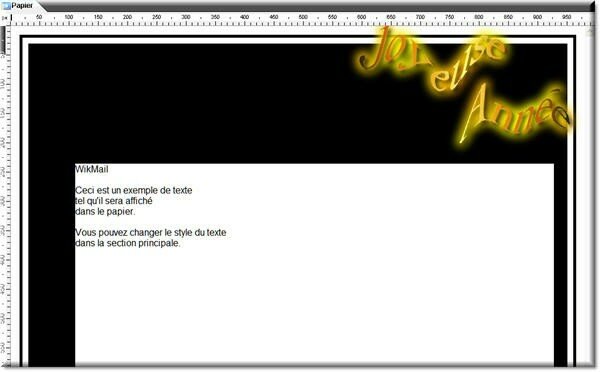
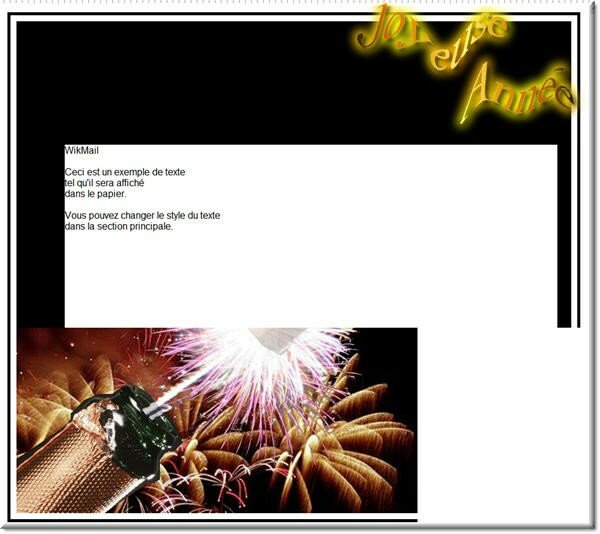
voici notre papier actuellement :
here is, our stationery currently:
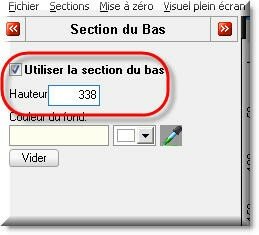
nous irons dans la section bas, nous indiquerons une hauteur correspondant exactement à la hauteur de nos images du bas :
in bottom section, we will indicate a height corresponding exactly to the height of our bottom images :
Pour la section bas gauche nous indiquerons la dimension exacte de notre image et cocherons les deux cases :
left bottom section we will indicate the exact dimension of our image and will notch the two boxes:

voici l'aperçu :
here the snapshot :
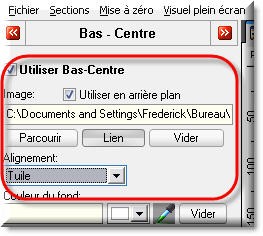
dans la section bas centre nous prendrons notre image et nous cocherons les deux cases et mettrons un alignement tuilé :
in the bottom center section we will put our image and we will notch the two boxes and will choose tiled :
voici l'aperçu :
here is :

pour finir avec le bas, dans la section bas droit nous indiquerons la dimension exacte de notre image et cocherons les deux cases :
to finish with bottom, in the right bottom section, we will indicate the exact dimension of our image and will notch the two boxes:

notre bas de papier est terminé, si nous avons indiqué les bonnes dimensions d'images, nous ne devons pas voir de raccords :
our bottom stationery is finished, if we indicated good dimensions of images, we should have seamless stationery:

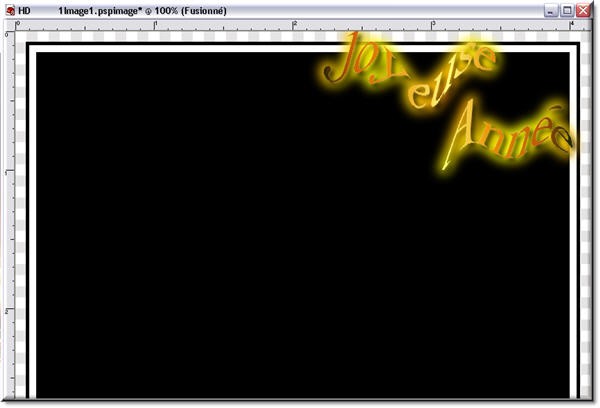
Enfin nous terminons par la section message. Nous allons mettre notre dernière image alignée en bas gauche :
we finish by the message section message. We will put our last image, aligned with the left bottom image:
L'image de la section message doit se raccorder exactement avec l'image du dessous , en tenant compte de la largeur de la section gauche. Notre papier est presque terminé :
The message section image must be seamless with the bottom part, our paper is almost finished:
nous reprendrons la section générale pour mettre une couleur sur la barre de défilement (ici c'est du noir, si nous avons une autre couleur, nous utiliserons la pipette) & nous pourrons aussi rajouter éventuellement une musique (.mid) :
we will take come back to the general section to give a color to the lift bar on the right & we can also add a music (mid):
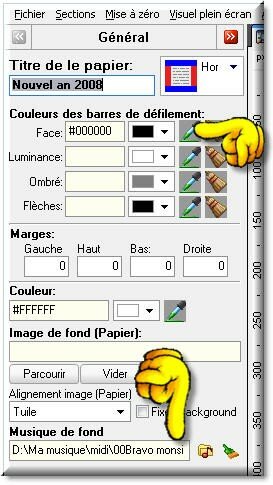
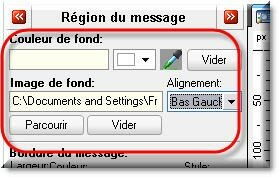
Dans la section message nous mettrons une couleur de fond identique à celle de la couleur de fond de notre image (ici noir) & nous choisirons une police de caractère :
In the message section message we will choose a background plain color , same as the image & we will choose a fonts:

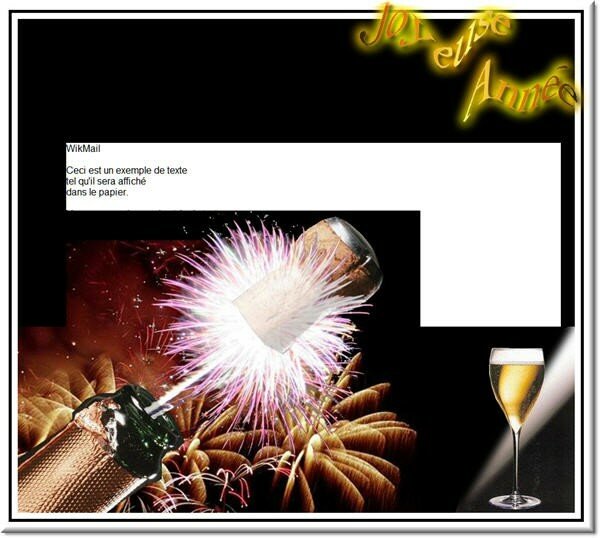
voilà notre papier terminé :
here is our finished stationery :

Si un passage ne vous parait pas clair, prenez contact avec moi
et partagez les papiers que vous aurez faits !
If a prt of the explaination does not appear clear to you, contact me and share stationery that you done


/https%3A%2F%2Fstorage.canalblog.com%2F62%2F29%2F226913%2F25043544_o.jpg)
/https%3A%2F%2Fstorage.canalblog.com%2F73%2F43%2F226913%2F25040458_o.jpg)
/https%3A%2F%2Fstorage.canalblog.com%2F12%2F18%2F226913%2F24821134_o.jpg)
/https%3A%2F%2Fstorage.canalblog.com%2F27%2F94%2F226913%2F24766222_o.jpg)